Hardening a Linux Server: Users, SSH, Firewall and Auditing
Take a fresh Ubuntu Server VM from default install to a hardened baseline: least-privilege users, key-only SSH, a default-deny firewall, automatic updates, fail2ban and auditd, then verify each change from a second machine.
Authorized environments only. Every lab runs in an isolated environment I own. Never test systems you don't have written permission to test.
Scenario
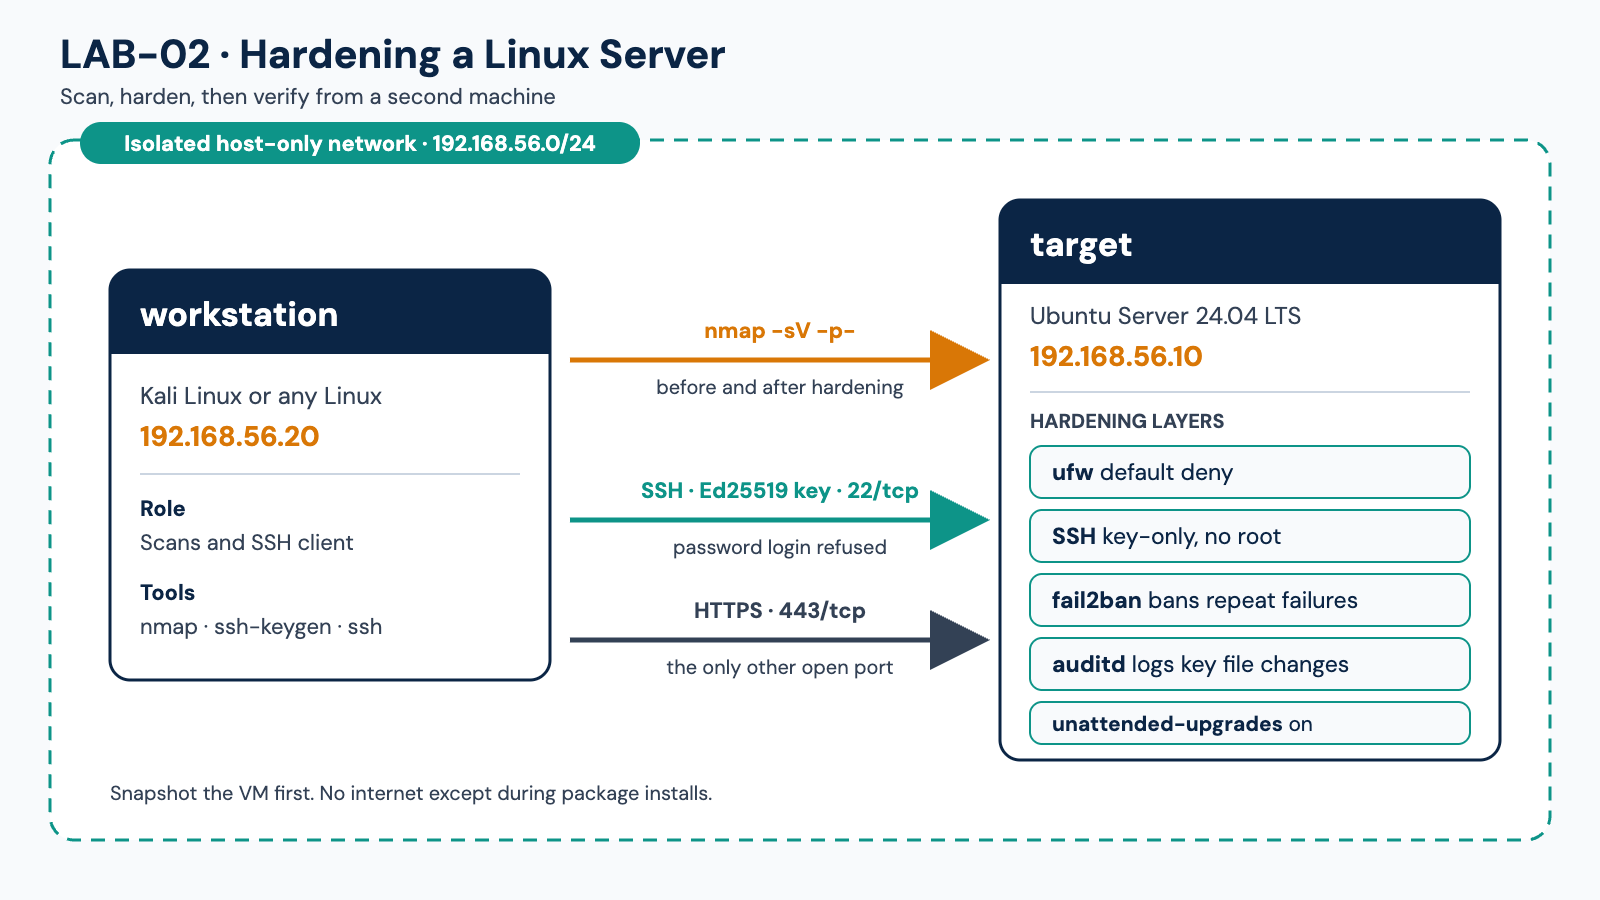
A small team has just provisioned a fresh Ubuntu Server VM that will host an internal web app. It is reachable over SSH with a password, runs with default settings and has no monitoring. Your job is to apply a practical hardening baseline, prove that each change works, and record what you found.
This lab uses a throwaway VM on an isolated network. Do not run these steps over a remote session on a production server until you have a console fallback, because a wrong SSH or firewall change can lock you out.
Objectives
- Create a least-privilege admin account and disable direct root login.
- Switch SSH to key-only authentication and reduce its attack surface.
- Apply a default-deny firewall with ufw.
- Enable automatic security updates.
- Block repeated login failures with fail2ban.
- Record security-relevant events with auditd.
- Measure the result with nmap and Lynis, before and after.
Environment
| Machine | OS | IP | Role |
|---|---|---|---|
| target | Ubuntu Server 24.04 LTS | 192.168.56.10 | Server to harden |
| workstation | Kali Linux or any Linux | 192.168.56.20 | Scans and SSH client |
- Network: host-only, 192.168.56.0/24, no internet except during package installs.
- Take a VM snapshot before you begin so you can roll back.
Steps
1. Baseline scan
From the workstation, record the starting state:
nmap -sV -p- 192.168.56.10 -oN baseline-nmap.txtOn the target, install and run Lynis:
sudo apt update && sudo apt install -y lynis
sudo lynis audit system | tee ~/lynis-before.txt
Note the hardening index and the list of warnings. This is your "before" evidence.
2. Users and sudo
Create a named admin user and check who has sudo:
sudo adduser mohamud-admin
sudo usermod -aG sudo mohamud-admin
getent group sudo
sudo awk -F: '($2 == "" ) {print $1}' /etc/shadow
The last command lists accounts with an empty password. It should print nothing. Lock the root password if it is set:
sudo passwd -l root3. SSH keys and configuration
On the workstation, create a key and copy it over:
ssh-keygen -t ed25519 -C "lab-workstation"
ssh-copy-id mohamud-admin@192.168.56.10
Open a second terminal and confirm key login works before changing anything else. Then create a drop-in file on the target:
sudo tee /etc/ssh/sshd_config.d/99-hardening.conf <<'EOF'
PermitRootLogin no
PasswordAuthentication no
KbdInteractiveAuthentication no
PubkeyAuthentication yes
MaxAuthTries 3
LoginGraceTime 30
X11Forwarding no
AllowUsers mohamud-admin
EOF
sudo sshd -t && sudo systemctl reload ssh
sshd -t checks the syntax first, so a typo does not break the service. Keep your original session open and test a new login in another terminal.
4. Firewall with ufw
sudo ufw default deny incoming
sudo ufw default allow outgoing
sudo ufw limit 22/tcp
sudo ufw allow 443/tcp
sudo ufw enable
sudo ufw status verbose
limit rate-limits repeated SSH connections from one address. Only open ports that a service really needs.
5. Automatic security updates
sudo apt install -y unattended-upgrades
sudo dpkg-reconfigure -plow unattended-upgrades
systemctl status unattended-upgrades --no-pager
Check /var/log/unattended-upgrades/ after a day to confirm it ran.
6. fail2ban
sudo apt install -y fail2ban
sudo tee /etc/fail2ban/jail.local <<'EOF'
[sshd]
enabled = true
maxretry = 4
findtime = 10m
bantime = 1h
EOF
sudo systemctl restart fail2ban
sudo fail2ban-client status sshd
Because password login is off, bans will mostly come from bots probing usernames. To test it, try several wrong logins from the workstation and watch the banned list grow. Unban yourself afterwards:
sudo fail2ban-client set sshd unbanip 192.168.56.207. Auditing with auditd
sudo apt install -y auditd
sudo tee /etc/audit/rules.d/lab.rules <<'EOF'
-w /etc/passwd -p wa -k identity
-w /etc/shadow -p wa -k identity
-w /etc/sudoers -p wa -k sudoers
-w /etc/ssh/sshd_config.d/ -p wa -k sshd_config
-a always,exit -F arch=b64 -S execve -F euid=0 -k root_exec
EOF
sudo augenrules --load
sudo auditctl -l
Trigger an event and search for it:
sudo touch /etc/ssh/sshd_config.d/test.conf
sudo ausearch -k sshd_config --start recent
sudo rm /etc/ssh/sshd_config.d/test.conf
8. Re-scan and compare
nmap -sV -p- 192.168.56.10 -oN after-nmap.txt
diff baseline-nmap.txt after-nmap.txt
sudo lynis audit system | tee ~/lynis-after.txt
Also confirm that a password login is now refused:
ssh -o PubkeyAuthentication=no mohamud-admin@192.168.56.10Expected result: Permission denied (publickey).
Findings
Not yet run. Fill this in with your own results.
| Check | Before | After |
|---|---|---|
| Open TCP ports (nmap) | ||
| Lynis hardening index | ||
| Password SSH login | ||
| Root SSH login | ||
| fail2ban bans during test | n/a | |
| auditd events captured | n/a |
Add short notes on anything unexpected, such as warnings Lynis still reports.
Lessons learned
- Test every SSH and firewall change from a second session before closing the first.
- Hardening is layered: no single control here is enough alone.
- Default-deny means you must know which ports a service needs.
- Logs only help if you read them. Auditing without review is just storage.
- Lynis suggestions are a to-do list, not a pass or fail grade. Judge each one against the server's role.
References
- Ubuntu Server documentation: security section
man sshd_config,man ufw,man auditd.rules- CIS Benchmark for Ubuntu Linux (free to download after registration)